Print on demand is a great program wherein books can be
printed one at a time as per order rather than having to bulk order. It is
therefore a great tool for self-publishers as you don't need to hand over a
large amount of money which you may or may not get back at the end of the day.
There are a few print on demand suppliers on the web but I
chose CreateSpace as it is an Amazon initiative, therefore you can link your
book with your eBooks, Amazon also has a number of well known distributors
which they will list your book with.


Step One: Create,
first you want to give a name to project, and then you want to select paperback
and then if you are a first time user you should click get started under the
guided option.
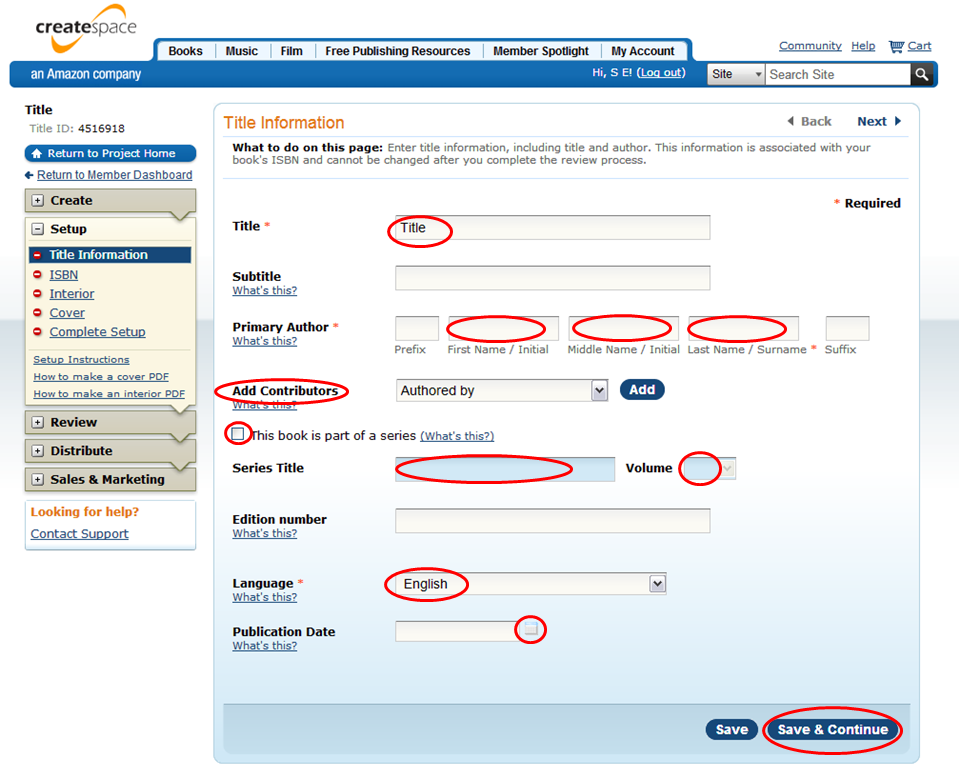
Step Two: Setup,
here you want to enter the title of your book, list the primary author and
under add contributors you want to use the drop down to select the editor and
any other contributors which you wish to attribute. Then select this book is
part of a series, if applicable, and enter the series name and the volume
number. Finally you want to enter current date as the publication date, or you
can opt to leave it blank, then press save and continue.


Then it’s time to upload your interior, here you want to
select the interior type, then choose your paper color, I suggest using cream
as it is easier on the eyes of the reader. You also need to choose your trim
size. And of course select to upload your book file.

Once your book file is uploaded you are given the option of
reviewing the interior online and I recommend that you do so.

When the interior viewer loads you want to fully assess your
book by flicking through it in its entirety.

What you want to look out for is your header and footer to
make sure they are all working correctly, and if it alerted you to any errors
you will want to view them so they can be addressed.

When happy with your interior file you can go on to load
your cover, here you get the option to choose a matte or glossy finish,
personally I prefer glossy. Then you will want to select build your cover
online and launch the cover creator.

Now if your cover is a .pdf file you can load it directly
however if your cover is an image file I recommend using the cover creator.
When the creator is launched it will ask you to choose a design and what you
want to do is find The Pine 6 x 9 Spineless.

You then need to upload your cover file. Once done you will
see that your cover takes up the whole design. You will note that there is a
red line around it which indicates that no text should appear within that area
and you will also see a spot where the barcode will appear.

If everything is correct you simply click submit cover. You
will then be taken back and asked to submit your files for review.

Step Three:
Review, once your interior and cover has been reviewed, which can take up to 24
hours, you will be asked to review the book yourself. First I suggest launching
their digital proofer.

The review is identical to the interior viewer but now you can see your book with the cover attached, I recommend that you go through and check over your interior one more time.

Afterwards simply exit and then order a proof copy of your
book. Now I recommend that you order one proof and after receiving it check
through it thoroughly, if you need to make changes do so and then order another
proof, repeat this step until you are happy with your book.

When you are satisfied you can approve your proof and your
book is now available for sale.

Step Four:
Distribution, here you want to select how your book is distributed, I recommend
you select all.

Next you want to set your price, in USD, you will notice
that when you enter your price it will calculate how much royalty you will be
paid depend on where your book is purchased from. If you wish you can choose to
set an independent price for the pound and the euro, or you can leave as is
which is calculated according to the price listed in USD.

After you have set the price you will be asked for a
description of your book, here you want to put your synopsis. Then you can add
additional information if you wish, a biography, the books main language, the
country of publication, keywords, and you can indicate whether if contains
adult content or is a large print edition.
If you haven't already you are given the option of
publishing a kindle version of your book as well, however if you already have a
kindle version you can skip this.
Step Five: Sales
and Marketing, now that your book is available you can keep track of sales and
if you wish can utilize some of CreateSpaces marketing kits.
And that’s it you are now a published author.
More Tutorials


0 comments:
Post a Comment